MapBox Flutter
This repository contains code corresponding to the Youtube video – https://youtu.be/ashk0mYLx9c
If you loved this work then you can support me by liking and sharing the video, and starring this repository! ?
? So what is this app now?
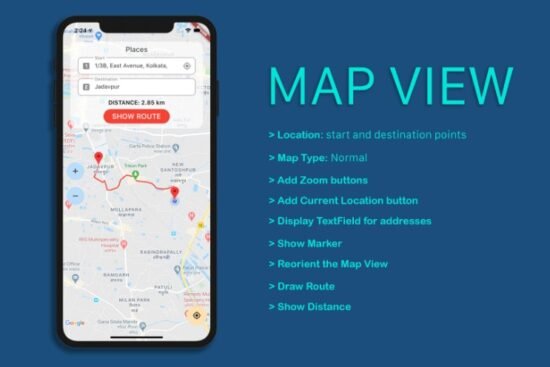
MapBox Flutter demonstrates an implementation of MapBox in a Flutter application, along with its Maps and Navigation SDKs. We will do this by building a simple project involving a hungry you on a bicycle and a set of restaurants and cafes! ?
??? Where are the instructions to get the app up and running?
Well open your browser and IDE, we have got a few things to do! Follow along as we get the app up and running.
- Head to https://account.mapbox.com and create a new account. Then go to your account page. You will see a public access token. This is something we will need later.
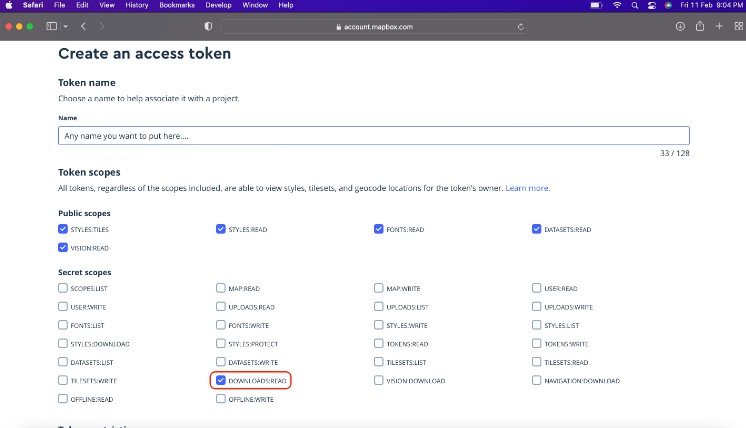
- In the same page click on Create a token and in the next page, add a new secret token. Make sure that the
DOWNLOADS:READpermission is checked here. After you create the token, you must copy it somewhere else because you can only see this once.
- Now that you have both the tokens, you just need to replace them in appropriate places of the project code. Open the
starter_code/mapbox_navigationfolder and look forYOUR_PUBLIC_ACCESS_TOKENandYOUR_SECRET_TOKENin the entire project. Replace them with the tokens gotten in Step 1 and 2 respectively. To double check you can make sure that –- For
ios: You must have put public token inRunner/Info.plistfile. - Some
android: You must have put public token as a string inapp/src/main/res/values/strings.xmland secret token as a string ingradle.propertiesfile.
- For
- To run the app in an IOS device/emulator, you will need 1 more step. Open or create
.netrcfile in your home directory. In there add the following lines:
assets folder and add a config/.env file. You can add one key-value pair there:That’s it. You follow these 5 steps and you should be good to go. Now I would also recommend going through the documentation for Android and iOS, because there is a lot more to it, like adding permissions and stuff, which I have already done for you.


